Friday, 17 July 2015

Quick and Easy a Journal

Debbie Davis is a mixed media artist who finds creating art to be a wonderful stress reliever. She plays a lot in the paint and other mixed media mediums whenever a chance comes her way. She also like painted backgrounds which she loves to keep in her journal books her favorite being a vintage ledger binder that she picked up from an antique store.

That said, she is always raring to go. However, while on a vacation, she did not get a chance to do much and on getting back she thought hard on what she could do at home and work that would look more of a journal.

With a blank mind, she chose to use a previously created background randomly made by scraping pink, yellow and blue/green paints. Within the paints there had been a loose mixture of some white fluid acrylic paint onto the ledger journal page using an old store card.

With a photo that she had always wanted to use in a journal, she copied and pasted it into a Word document and resized it so that it would fit on the journal page. The whole thing was looking so calm. She then collaged the photo with cabanas that she had gotten from a scrap paper.

Then using a Stabilo pencil she outlined the photo and cabanasand lightly went over the pencil with a wet brush.

Writing of words was next which she did with the Stabilo pencil. The words made the whole artwork stand out.

Making your Own Mixed Media Décor Pillow

Our homes require a personal touch when it comes to décor. This is the simple reason that Melanie Statnick smiles back at herself whenever she visits home décor and craft stores on seeing an abundance of decor items. Some of them include Decor boxes, wall art, candle holders, garden and décor pillows.

With all the collections she would find, Melanie attempted to make a Décor pillow using a sewing machine, even though she had undertaken Home Studiesmany moons ago. However, instruction books and DVD’s that come with most machines today would give some relieve to her work.

Depending on the fabric you’ll want to play with, you will require 2 sheets of burlap and canvas squares each. The art will be on the canvas side though.

You can choose to use a stencil which you lay out on the section you want then use ink spray to give it the effect you want.

It is not necessary that you use the fine mist around the design if you don’t like it. It could probably look messy at some point. In this case cover your edges with scrap paper. To fame the design, a boarder of lace ribbon would do using fabric glue in addition to glued buttons on the corners.

To ascertain that your work is ready, allow it to dry for 24 hours before adding the stuffing and if you don’t want it to run off its ink, spray with a fabric sealer.

Tuesday, 14 July 2015

Focal Points and Mixed Media Art

Did you know you can tell a story with mixed media art? Yes you can but how you place your focal points is of importance. Madeline Faiella chose to explain this concept by using 3 feet tall and 2 feet widecourt room board but on a smaller surface and to which she added a base of white paint and gesso.

The feeling of being able to re-use something is awesome. She used paper, painted with acrylic to make a face and attached it the base of the board using gesso. Then using light, graduated layers, she applied molding paste across the base surface.

At this point ensure the edges are up to standard with the background and you can choose to use lighter layers. In the event you chose to use many layers, give your work some good time to dry. You can only achieve proper drying if you leave your work overnight between each layering.

Careful planning and having enough spontaneity are of essence. Keep the colors in mind and have a thorough check of your work after each layer.

Madeline who has written continuing columns for the art and creative community says that you can achieve anything through trying new things and being creative. She has a tone of tools for her work which she uses for her varied work.

Working on a Mandala Design

Shari Welch has been creating art for as long as she can remember after having studies graphic design in Portland and thereafter putting all her focus on mixed media art. She gets creative with any simple design that comes her way.

This time round, she intends to put her creativity on a simple Mandala design. Mandalas are useful devices for concentrating with yourself and getting in touch with your own inner reality. The secret of connecting with your spiritual core is by use of color on a Mandala.

But how do you create a Mandala? You can use lines, dots, circles, and a few diamond shapes:
  • Create a circle on a 4×4 canvas and using a lid as a template.
  • Paint around the outside of the circle black and use the end of a paintbrush to create dots to fill your circle. Make sure you get the right size of the dot.
  • You can use different shades of the same color family, complementary colors or otherwise. Though it is up to you, you can choose to add small dots around larger ones to define them.
  • Be creative and experiment with dashes, diamonds, curved and straight lines and only stop when you are contented with your piece of work.
Since creation of Mandalas could be very detailed works of art, all you need to do is exercise some creativity and you can create one in an hour or less.

Thursday, 9 July 2015

Making Recycled ATC Card Holder

Anjuli Johnson is so passionate about working with cards. In an effort to explore her passion, she decides to make for her younger sister an ATC card holder, with 25 separate slots for 25 scripture cards.

It has to be well-made and easy to work with. The cards should be held in place so that nothing falls out or gets lost. This is how she went about it:
  • Use of thick paper would do from which she would cut strips of 9” by 4 ½”and scored them at 3” and 6”. Folded and glued each envelope was 3” by 4 ½”
A cereal box cardboard would be ideal for a cover which doesn’t have to be thick for easy use and which would be painted black with additions of paper and tissue tape for a cool but clean and simple look.
  • The modified cover measurements ended up being 14” long and 3 ¼” wide, with scored lines at 2”, 4” 8 ¾”, 10 ¾”. 
  • Envelopes were then glued one at a time starting at the back of the cover and then one on top of the other.
  • The latch for the cover was made using metal findings to create a knob for a loop of elastic. A bit of metal glue would give a great closure which would ensure that the cards are all intact.
Anjuli is always raring to go,to discover and also develop her talents while meeting new people from whom she strives to learn.

Ideas when Making Tag Books

Anything made from tags present good beauty. Melanie Statnick who uses scrapbook paper and Kraft paper with collaged images knows this too well. You can either gather pre-made tags or cut them into shapes that you so prefer. For the pages, any type of paper would serve.
  • Fold the tag into half, then cut and fold blank pages to size and staple to the inside
  • Cut assorted images and words and glue them onto your pages to create a story or note book.It does not matter much whether you use the front or back side or both; either option will post good results. 
  • You can choose to decorate the covers. It’s an easy and quick task from which you can make dozens of them. 
As Melanie who is a published artist would put it, artwork is all about creativity. It is from this mentality that she is able to create art daily from her private studio.

Besides, as an artist you ought to know how to go out of your way with experimentation. The end result should not be such a bother at first because it is through experiments that you get to learn. Get up and become creative!

Tuesday, 7 July 2015

Using Radiant Neon Amplify


In this article we will tell you about Martice Smith II who is a well-known and established freelance Illustrator and graphic designer. She basically specializes in mixed-media illustrations with her love of art being felt across the state of Missouri.

She has a special take for the use of intense color in mixed-media creations. After receiving eight beautifully vibrant colors from Imagine® Crafts Product; Electric Yellow, Electric Coral, Electric Orange, Electric Blue, Electric Purple, Electric Green, Black, and White, she was over the moon.

They are versatile and easy to use and will make any artist to go an extra mile hence the desire for Martice to share a few techniques where no skill level is required.

This is what she did to the new Radiant Neon Amplify:

· 8×10 Gelli Arts – Gel Printing Plate will work just well

· Draw simple shapes, straight from the paint bottle

The inks are easy to work with because they are water-based pigment.

· To add a textured border along the edge of a page, use a stencil + a foam pouncer.

· Then you can add dimensional texture as you may so wish.

The following are some of the key elements that you should give great consideration when dealing with Radiant Neon Amplify.

· Have the dimensionality on point and ensure the texture is worth a touch.

· Strong and a combination of both dark and light colors are preferred.

· Maintenance and storage of Radiant Neon Amplify is of importance.

Get encouraged and start creating.

Handmade Greeting Cards

When Michelle G. Brown is not creating on her Facebook page, she is somewhere thinking hard about her creation. Her passion of being a mixed media artist comes from sharing her knowledge and techniques with other people. This alone comforts her in knowing that courtesy of her, other people can easily express their own creativity.

So what is she up to this time round? Creation of handmade greeting cards for Mother’s Day! These are the simple supplies that she played around with to get that magnificent card:

· Stencil and a range of pastels

· Matching color cards

· A range of soft sponges

· 2-sided tape

· Bristol Paper

· Versamark ink

Here are the instructions:

· From the pad, get out the sheet of Mixed media or Bristol paper

· Stamp large stamp image around paper using Versamark ink

· Using a masking tape, make sure to secure the stamped card

· Use a light circular motion with a sponge to add a colour of your choice. The stamped patterns will appear

· Keep adding the different colors that you have alongside blending the edges between the colors to fade out any sharp lines

· You can remove the stencil and spray with workable fixative

· Now cut the colors background to fit onto the card of your choice

This world is full of creation and according to Michelle; everyone has room to explore since the amazing world of mixed media art is accessible to everyone.

Saturday, 4 July 2015

Having Fun with Mixed Media Canvas

Kim Kelley who is extremely obsessed with her crafting and art is constantly having projects to a point that sometimes she forgets what they were meant for. She has a thing with being imaginative and is always exploring anything that comes to her mind.

Her love of wanting to learn new techniques is evident. This month she decided to go for canvas project that is a little larger than what she does normally. So what did she require for this?
  • Chipboard from Dusty Attic
  • Spray mist by Lindy’s Shabby Tuxbine Teal
  • 8” x 24” canvas
  • Heavy Gel by Golden
  • White gesso
  • Glue gun
  • Miscellaneous charms, flowers, metal pieces, wooden pieces, and jewelry pieces
Kim doesn’t have a particular of doing this but she will explore on any idea she comes about using theme, colors and style.

She advises that it is best to use the already primed canvas although you can still add your own gesso. Once the gesso dries up, start laying out your pieces, turning them this way and that way until you can finally smile at what you are seeing.

You will use the hot glue gun to attach smaller pieces while the bigger ones you will use Heavy Gel. Don’t be in a hurry to spray. Wait until all is dried up.

Creation is all about going beyond your comfort zone. Imagination comes in handy which lead to finding your own inner creative artist.

Is Scrapbooking Dead?


Ann Strecko Koeman believes in making things work with whatever comes her way hence she is always collecting things. Being a Mixed Media Artist, she finds use for every of her collections.

While a majority of people seem to be in total agreement with the selling of scrapbooking supplies having reached its peak and probably declining, she feels otherwise.

According to her, there is still some hope. After all the concept of collecting and cataloguing memories in paper form has been around since the invention of paper.

“The tools we have invested in, in our line of duty and creation should not go to waste,” Ann said. “Keep them and use them whenever necessary since it could be the wave to future creativity”. She continued.

Over the years Ann has collected a variety of skills and thus a vast collection of tools including an overpriced collection of intended for scrapbooking tools.

As a Mixed Media Artist, any tool to her is useful at some time in her artistic career. Just because a tool or supply is marketed to be sold in one market does not mean it cannot be used in another.

She has a lot to look up to including old trimmers, punches, plastic page layout guides, stickers and embellishments

Her parting shot is Scrapbooking may be a dying fad but Mixed media art making is very much alive.

Friday, 3 July 2015

Mixed Media Journal

Terri Sproul who is a renowned Mixed Media Artist and she believes that there is no mistake in creativity since it is all about creation. Hence in many cases you are free to run your journals to your liking so long as you are having utmost fun from what you are doing.

What you need to do is to have an experience of playing with different mediums but this can only happen when you decide to step out of the box.

You can run your experiments on Color and Texture to complete a fun experience. Here is a list of the materials you may require:
  • Stencil and stamps 
  • Silk Acrylic Glaze from ColourArte
  • FineLine Applicator
  • Golden
  • Faber-Castell – Pitt Pens Black
  • Paint Brushes, Baby Wipes
  • Gesso
  • India Ink
Terri has always been passionate about being creative. She says that sitting down to create just from her own thoughts gives her excitement.

With the support from her husband she is destined for bigger things in Mixed Media. Into her way of growing within her creativity, you will find her hosting a live show about Art Journals every Tuesday Night. She has a blog - terrisproul.blogspot.com from where you will get more of her work.

Making your Own Canvas Fabric Bag

Tamara Dinius loves creating things from her own accord which she comfortably does from her studio. Out of her own imagination, she attempted to create a functional mixed media tote bag using canvas fabric and Tattered Angels High Impact paints.

This is how she did it after gathering her items which included spray bottle, Tattered Angels High Impact Paints, stencils, brushes, and permanent markers:
  • On the left and right sides, Spray your canvas fabric with water and then apply your yellow paint in a haphazard motion.
  • At the bottom left, and while it is still damp, apply your orange paint using a stencil and stencil brush.
  • At the bottom right, add water and your yellow paint using a stencil of your choosing. 
  • On either side, you can add the writings of your desire using a stencil. 
At the finishing stage, use a contrasting thread to topstitch the seams you want. At this point you are allowed to add some freestyle quilting to the bag using different colored threads.

You will then add long handles to the bag using the same red canvas fabric that you used at the middle portion.

With any form of creativity and imagination, this project can turn out to be really fun. For example, Tamara used permanent markers of varying colors to add various writings on the bag. According to her, creativity is a way of life in which you can experiment so many styles.

Saturday, 16 May 2015

Kraft Paper and Journal Pages

You must have either met or heard of this Artist Melanie Statnick who writes and creates from her private studio. When she discovered kraft paper artwork on blogs and from other artists, she couldn’t wait any longer to start playing around with them.

There are 1000 of great projects that one can use Kraft paper for. From papers, banners, cards, table clothes to paper flowers, all these give such a crafty feeling.

She decided to create a mini project on canvas that seemed to take all her favorite stencils while outlining it using white gel pen. Though a bold move at first, it can be very nervous because of the permanence of the pen.

The stencil has two pieces outer edge and inner piece of the pod. Thus it is so versatile. You are spoilt for choice of how you want to use it; either on one side or both. Using a Pitt Pen in bold black, Melanie layered her piece of art with the inner stencil while painting it with acrylic paint and adding words that came with the stencil.

This was a delightful yet easy project. According to her, it is important that we learn to go out of our full filled day’s families and unexpected issues and put our creativity to task.

Getting Creative with Mixed Media Art

Mixed Media Artists need not to spend hours creating unique components to use in their creative projects.This is because Mixed media is all about experimentation with combined materials, mediums and techniques.

Gail Green who is a crafty book author says that the use of colour, texture, images dimensions and our own interpretation will always give us unique results.

That said, she has discovered awesome products and product lines which make us feel mojo or do the tiring and time consuming parts. All this allows us to get creative.

Gail loves all projects that come her way. She will try anything and everything. She was fortunate enough to find a perfect line of canvas products at CHA show where she came across Linnie Blooms booth. She kept running into the Owner and Founder of Linnie Blooms, Linda Barutha.

Linnie Blooms products include canvas shapes and canvas items. In addition to this you will find other range of products, the likes of interesting stencils. Apparently, Linda includes “knock outs” in her stencils and artists can use both the negative space stencils.

Linda also has fun stamps and phrases that can be used on the canvas pieces as well as on traditional cardstock for card making.

According to Gail, Linnie Blooms Canvas Bracelet is a perfect show of how Mixed Media projects can be satisfying.

Using ColourArte Products

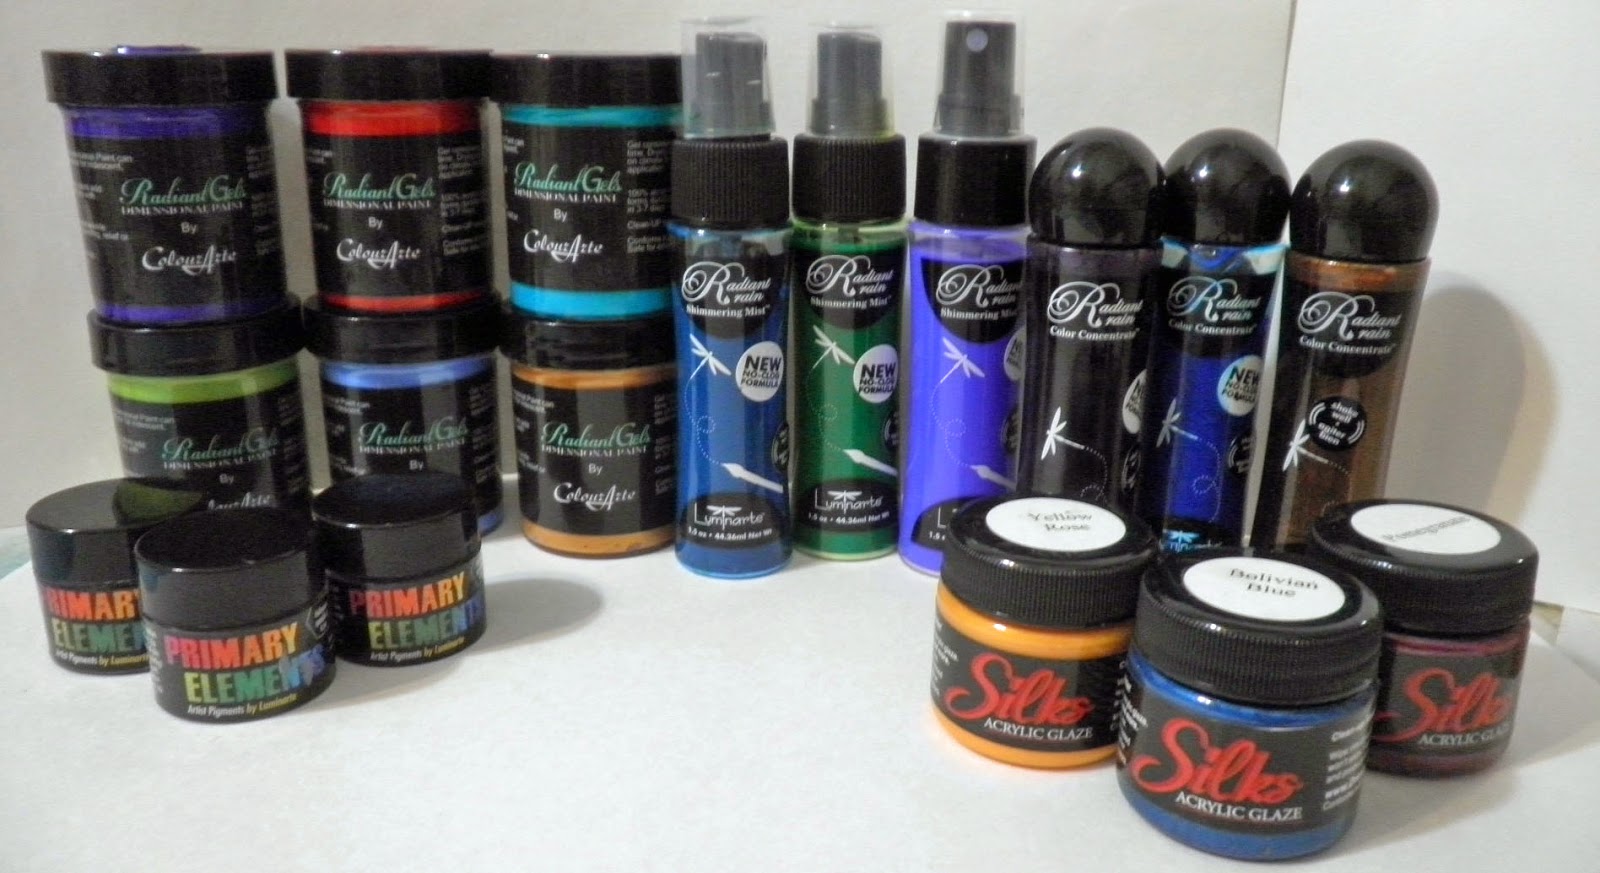
The amazing paint products, such as Radiant Gels, Radiant Rains, Primary Elements Artist Pigments™, Silks Acrylic Glaze, and Twinkling H20s are manufactured by ColourArte. That said, Barbara who is a mixed media artist and loves to teach and learn new techniques while sharing her knowledge with other artists is now up to the task of sharing some examples of diversity, as well as observations, using these products.

How does she do this? She has prepared a white tag for each product description to explain to you the diversity of each ColourArte product.

She starts with Radiant Gels Dimensional Paint is the newest product in the ColourArte line. It is a thick, shimmery paint that can be used for many different mixed media applications. It not only can be used as paint and brushed out to a beautiful, transparent color.

Next, there are Radiant Rains in two different bottles. The Color Concentrates come in dauber bottles, while the Shimmering Mists come in mister bottles. There are 21 Color Concentrates and 26 Shimmering Mists.

Then there are the well-known Twinkling H20s Shimmering Watercolors. These are cakes of intense shimmering watercolor that you activate with water. The colors are so concentrated that a little goes a very long way.

Last, but not least, are the gorgeous Silks Acrylic Glazes. These are the most luscious, shimmery paints.

Barbara is a contributing artist in a book and from what she writes; you will easily notice her passion for creativity and learning new things.

Friday, 15 May 2015

Linnie Blooms and Linda Barutha

Michelle G. Brown understands that we all have an inner need to create, and bylearning a few basic techniques, the amazing world of mixed media art would be accessible to everyone.

When she came across the Linnie Blooms booth at CHA Winter Show 2015, she literally wondered why we don’t think about something new in crafting that leaves us completely impressed and mesmerized.

The range of alterable, mixed media items, made from canvas and recycled ephemera, with stitching on them was remarkable. That is how she got introduced to Lindy Barutha and her company Linnie Blooms whose range includes both substrate items – 12×12 panels, stitched journals and mini folios. This is in addition to canvas embellishments in the shapes of flowers, butterflies and many other designs.

When it comes to decoration, Linnie Bloom uses its current art supplies. They don’t need any special fabric supplies. Linda who has been building Linnie Blooms since mid-2013 says that she has always been creative and loves to create her own designs.

Linda is also working with two major online retailers to provide stitched kits. However, she has had to move from sewing all of the pieces herself, to having a few sewing assistants. The next few months are exciting for Linda and Linnie Blooms as she looks forward to featuring an online workshop. Watch out for this and much more.

Using your Positive Thoughts

“There is power in positive thoughts once you begin your day in them”. This is according to Shari Welch who has been creating art for as long as she can remember. All her focus was shifted to Mixed Media Art after her graphic design studies in Portland.

As a way of starting her morning and with her positive thoughts, she decided to create a pretty little art block. Here is what she did:

Materials used:
  • Wooden block
  • Drawer pull
  • American multipurpose ink
  • Distress ink
  • Fibrous String
  • Embellishments
  • Diamond mesh ribbon
  • DecorArt
This is how to go about it:
  • Find images that will fit into your artwork and you can make use of online companies that sell images
  • Cut your images to size and make the edges rounded using corner punches while you define them with distress ink.
  • Paint the art block and the feet probably with a different color for each. To speed up the dry time, you can choose to use hairdryer then using E6000, glue the feet on the block.
  • Using tacky glue, glue the images on the block and accentuate them around when all dry using glamour dust. You can make use of your creativity as much.
  • You can now tie your embellishment on the fibrous ribbon before moving on to the drawer pull.
With her passion of Mixed Media Art, she emphasizes that creativity in all this is of essence.

Acrylic Backgrounds with Water

Anjuli Johnson is a self-taught artist who has done a lot of experimentation with paint and having begun her career as a scrapbooker, she is now Mixed Media Artist. She has been undergoing an evolutionary process all along.

With watercolor, oil and gouache Anjuli will always prefer acrylic because of the different reactions of their brands. For one it dries very fast and reacts really well in water. She uses water and paint to create acrylic backgrounds for her mixed media paintings.

She has three paintings to show and as follows:

Magnetism – You will use dry canvas and the colors you chose. For her it was red and orange paint. Ensure you get rid of any brushstrokes on your canvas.

True North – In this case, she misted the canvas before working on it. There were certain areas where she concentrated the paint. The brushstrokes all disappeared.

Pacific Reef – Here, a brush was not used. Instead, in the dry canvas, thick spots of paint were added in random places. Fingers are used to flatten and spread the paint as one sprays along. The entire canvas should be all wet.

According to Anjuli and with her imagination and creativity, there are so many ways one can use water with acrylic paint and get very exciting backgrounds. She loves Mixed Media art and it is she constantly tries to push her fears away so as to build on her creativity and discover her talents.

Thursday, 7 May 2015

Handwriting on Adventure

Martice Smith II is an established freelancer illustrator and graphic designer. She has established a niche for herself within the Mixed Media Art since she does more specializations on the mixed media illustrations.

That said, she has a thing for graffiti – style which she considers a fun mixture of bold and expressive calligraphy. It makes her handwriting become more unique and easy to recognize. With her spirits more often than not transcending into artistry, there are times she will prefer to look imperfect and scribbly.

She describes the world around you as your oyster hence advises that “You take an adventure” as she takes you through a quick adventure on finding your voice within your handwriting. And what are the sources of her inspirations:
  • Food packaging
  • Billboards
  • Kids’ writing
  • Murals on trains
  • Expanding the powers of observation
  • Looking out for brand packaging
Having gained the inspiration, here are the supplies that you shall need:
  • Assortment of markers and fine point pens
  • Skewer or toothpick
  • Speedball’s Super Black India ink.
Here is what you now need to do:
  • Writer large letterforms with your chise – tip marker and work randomly across the page
  • Try writing a phrase is a circular shape using a pen with a smaller point. For smoother writing, you may have to rotate the page and allow the words to look like a series of marks
  • Exaggerate the letterforms and lines as you make your own way
  • Finally draw scribbly flourishes with a toothpick dipped in India ink.
It’s all about what makes you happy.

Making Altered Daily Journal Cover

It is from her private studio that Melanie Statnick who is an accomplished artist will do her art creation besides writing. And with her love of writing she has been on a mission to get a journal big enough to accommodate reflections on a daily basis since she did not want to spend even a single coin on buying one.

As such the thought of upcycling build up in her mind due to the fact that it would give her room to exercise her imagination. She took black gesso which she would use to cover the front of the journal. Black gesso is of more preference because it leaves with a primed black surface which is easy to use with white gel pens.

Over the gesso surface, Melanie painted a wide rectangle of turquoise and added a weekly stencil which is an Artistcellar product. She then used various stencils for quick and easy creation of a stenciled background. She wanted to be experimental.

To add flavor to the journal, she first added the year before outlining days of the week using a PITT pen. She then added some detail to the cover with start while making good use of a white gel pen.

Finally she was happy with what she had created