Tuesday, 7 January 2014

Artistic Mixed Media Ornaments for Christmas

It is during a festive season that many people tend to show case their creativity especially in art. Mixed Media has not been left behind. In an effort to share their passion Mixed Media Art has been able to put to good use its techniques by making Media Christmas Ornaments using the Mixed Media supplies. Let’s see what they made:

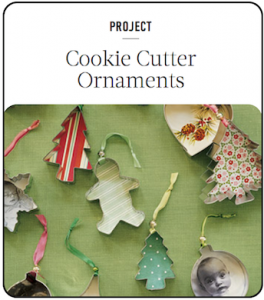
  • Cookie Cutter Ornaments - While your creativity in making this will dictate you – whether to be simple or lavish, you will be able to display those lovely ephemera sheets and lovely background. However the glueing part will need a lot of care. 
  • Paper Origami Flower Ornaments - According to Jenn of Origami Twist this involves glueing and folding gorgeous flower ornaments. 

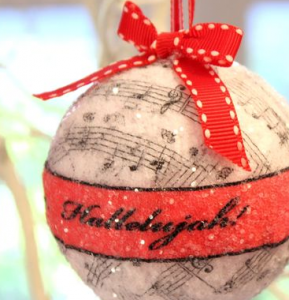
  • Paper Ephemera ornaments - This comes about as a result of lots of collections which include old book pages, paper ephemera, and painted backgrounds in addition to Gelli prints. You can also add some red ribbon and sparkly glitter to this Christmas ornament.

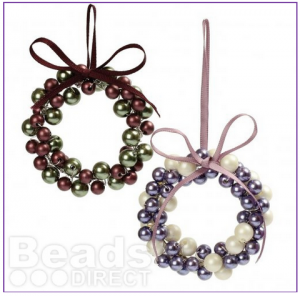
  • Beading Mini Wreath Ornament - Those that are passionate about jewellary, it is in making this ornament that you will be able to apply your jewellary making skills. You will then need a collection of beads, jewellary wire and some ribbons. To create an interesting wreath, you could mix buttons and beads.


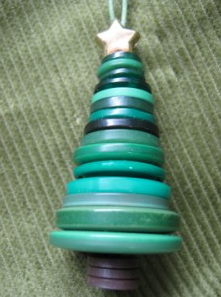
  • Button Tree Ornaments - This is a must try ornament for those of us that are button fetish. 


Tuesday, 12 November 2013

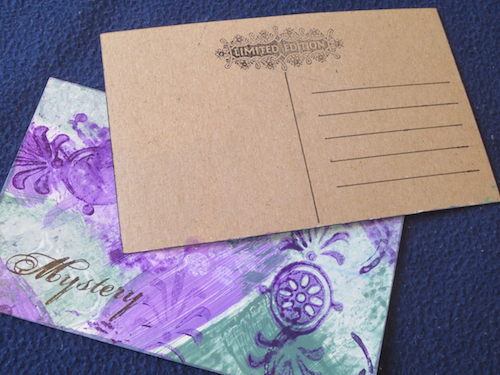
Want to Learn How to Make a Postcard? Register now for Mixed Media Postcard Art Tutorial

Probably you did not know how well you can celebrate a birthday or an anniversary without necessarily being too expensive. Mixed Media Art is one platform that will show you how well you can achieve this using available mixed media techniques that will help you put create and out together post cards that you can use to invite your friends and family to your big occasion. Your skill level at this point does not matter and neither is your preferred style. At the end of it all it is about the inspiration you get from your work.

It is for this reason that Mixed Media Art has established two sessions for online tutorial art that will help you come to terms with what suits you best. These will be online tutorials that will help you develop your Mixed Media Skills towards creating of a postcard. And why do you choose on a postcard? You can play around with simple techniques that will eventually create wonderful backgrounds that can be used during any holiday season. Good luck as you attend the sessions.

Come and visit our tutorial video - it's available right now!

Monday, 21 October 2013

Gelli Plates is what you Need from Gelli Arts for your Prints

Probably you have no idea how much more Mixed Media Art has to offer and the level of customization you can get to. The imagination that you want to use gelatine to make your own printing plate could make you sick because of the messy situation associated with gelatine plus the fact that you will spend so much time.

However GelliArts have created the Gelli Plate which is an alternative for you and much better because it is non - perishable. It will give you the same results as having used gelatine but it is non – toxic and you will be able to make many more prints. You will get the Gelli Plate in three different sizes 6″x6″, 8″x10″ and 12″ x 14″. It is said that the 8″x10″ is the best for A4 sheets of paper.

While it is advisable that you gather together all the materials you need as well as ensuring you have enough space, see below some of these materials that you will need:
  • Acrylic paints
  • The Gelli Plate
  • A brayer and mark making tools
  • Stencils
  • Netting or lace
  • Sequence wrap
Even as you make your prints you ought o exercise some creativity.

Saturday, 10 August 2013

The Beauty of Stencils on your Mixed Media Artwork

We would all love to put our creativity to book for everyone to see. During your creation, have you ever thought of what beauty you would experience by the use of Stencils? With them you are able to add shapes and patterns to your work giving some perfection to it.

See below the types of stencils you can work with:
  • Found objects like paper doilies, leaves, pressed flowers and feathers all that can be found around your home.
  • You can chose to make your own stencils that will allow you to have full control over your creativity. You can create own photos and print then in whatever color you wish to. 
  • Buy ready made stencils from your local craft stores. 
Your approach to using stencils needs to be slow and steady especially when adding layers to your creative work. As you add your palette and paint to your brush make sure you run a test to make sure the wetness is not too much. Too much paint will lead to “bleeding” of the stencil where the paint runs from under the stencil which leads to losing your design.

Check your results after the use of each stencil to confirm that all is well before adding any other. Enjoy your creation.

Thursday, 11 July 2013

Creating Little Fat Books

More often than not, some of the interests we have are lengthened and strengthened through increased learning and attending workshops on the same. From them we learn the basics and simply try to experiment what we learn.

Have you heard of Little Fat Books? They are much smaller than the normal handmade books with a measurement of 10.5cm x 10.5cm. They could feature with found objects on them or with nature elements.

Among the many that you can find, include one that you can look through a central circular. Making of Little Fat Books can be all exciting and in various types and shapes. You can also use different layers of color and the many materials that you can recycle soft drink bottle caps cut, rusted, circular metallic pieces while incorporating painted curtain rings.

One of the many Little Fat Books you can build on with your knowledge and as an interest is called “Twigs”. It is unique with two pages that are adjacent to each other. Little Fat Books have a stunning look and especially if you have the basics at hand. Because of their sizes they can our comfortably fit onto your hands.

Look out for these elements. They will entice your interests further.
Monday, 24 June 2013

Mixed Media Painting Tip

When creating mixed media paintings, I love using water color paper but it's hard to keep it flat or to prevent paint from getting on the wrong side. Here Michelle explains how she uses a backing board to keep the paper safe.


Key materials:
- Piece of Coreflute; this piece is 11.5" x 20"
- Cereal box plastic
- Masking tape

Note: any thick cardboard will be sufficient. It just needs to be stiff enough to hold its own weight.

** Have you tried this technique? ** I'd love to hear what you have tried! **

Sunday, 2 June 2013

Have You Ever Thought of Working with Canvas?

Beauty is good and beautiful things motivate us on a daily basis thus everyone loves beauty. After all who does not like being identified with a beautiful thing or item and more so that which has been done on a self creativity platform?

Have ever thought of what you can do with canvas? Has it ever occurred in you that mixed media art can be applied on mini media canvas? From canvas you can achieve a lot and in many cases it should be the size of “4x4”. 

You can literally use it to make mixed media collage on but you will need embossing paste for sticking items with. There is nothing you cannot be glued on it which are preferred to be metallic the likes of metallic flowers as small as you want and as big as you want. You can also make them with the shapes that please you best.

Besides you can also choose to spray with colorations while fixing up other smaller shapes than the metallic flowers. At the end of it will look more of an orchard. Beads can be added at the middle of each flower and on completion you will have made use of a simple canvas to produce a beautiful piece of work.